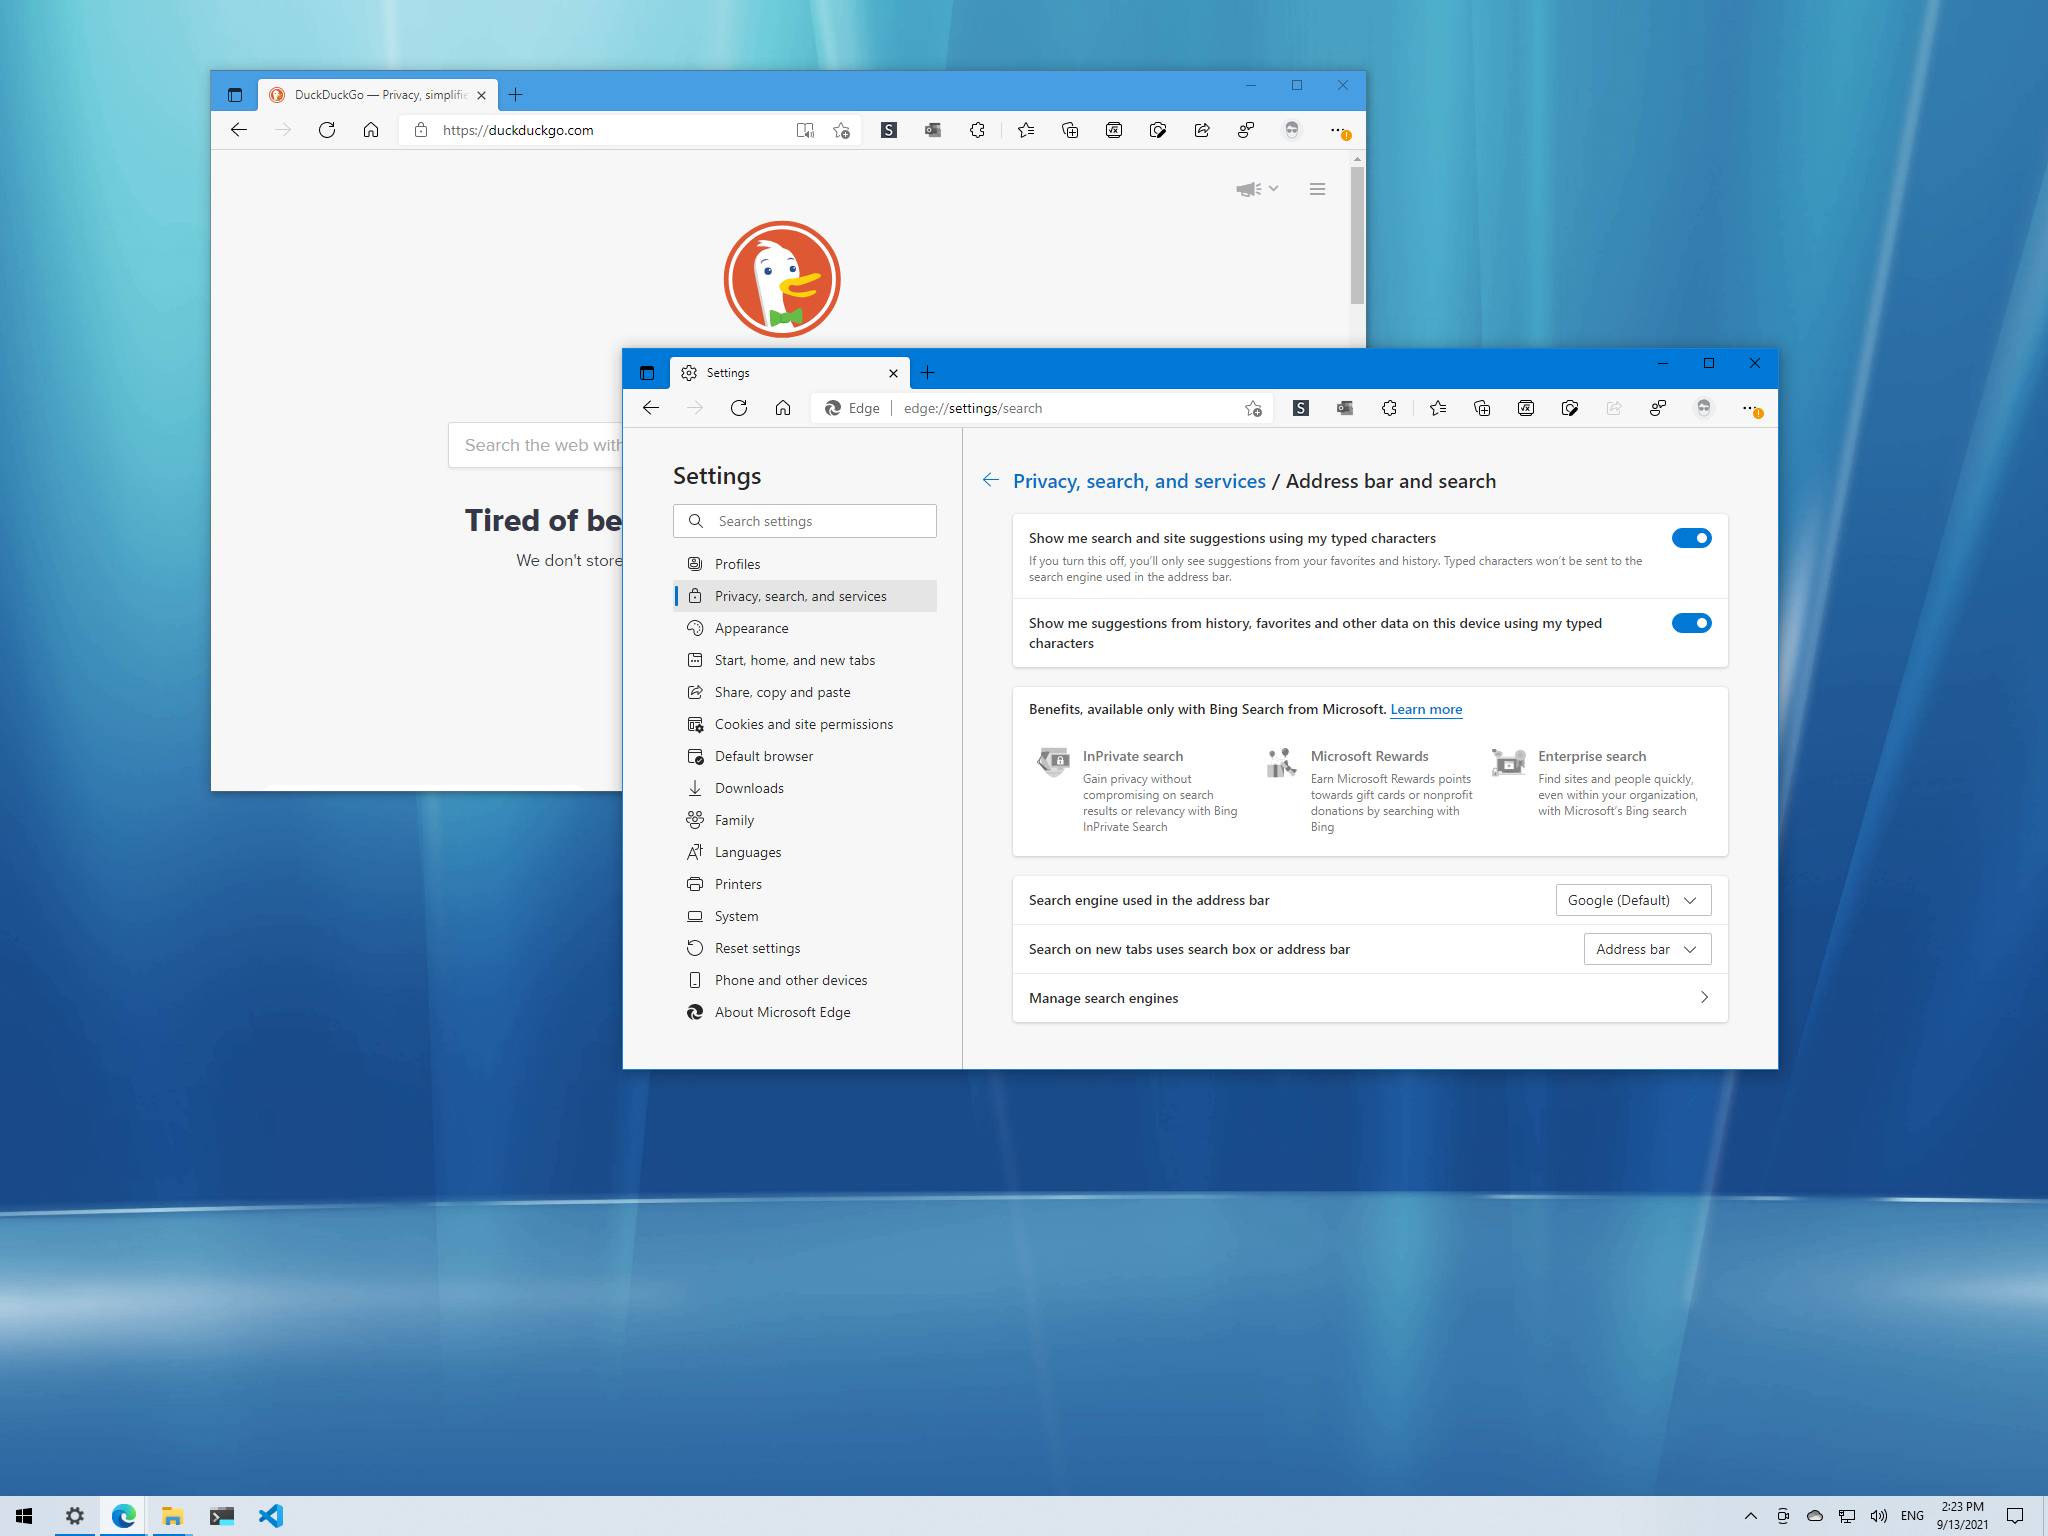
If you don't like Bing, this guide shows you the steps to set another default search engine on Microsoft Edge.
Microsoft Edge comes with Bing as the default search engine, but even though Microsoft's engine provides a great search experience, it's not for everyone.
If you are moving from Chrome, and you want to keep using Google as your default engine, or you prefer something different (such as DuckDuckGo, Yahoo, Ask, etc.), Microsoft Edge includes an option to set another search engine. The only caveat is to know where to find the option since it is buried deep inside the settings.
In this Windows 10 guide, we will walk you through the steps to change the default search engine on Microsoft Edge for Windows and other platforms.
- How to change default search engine on Microsoft Edge
- How to set custom search engine on Microsoft Edge
How to change default search engine on Microsoft Edge
To change the default search engine on Microsoft Edge, use these steps:
- Open Microsoft Edge.
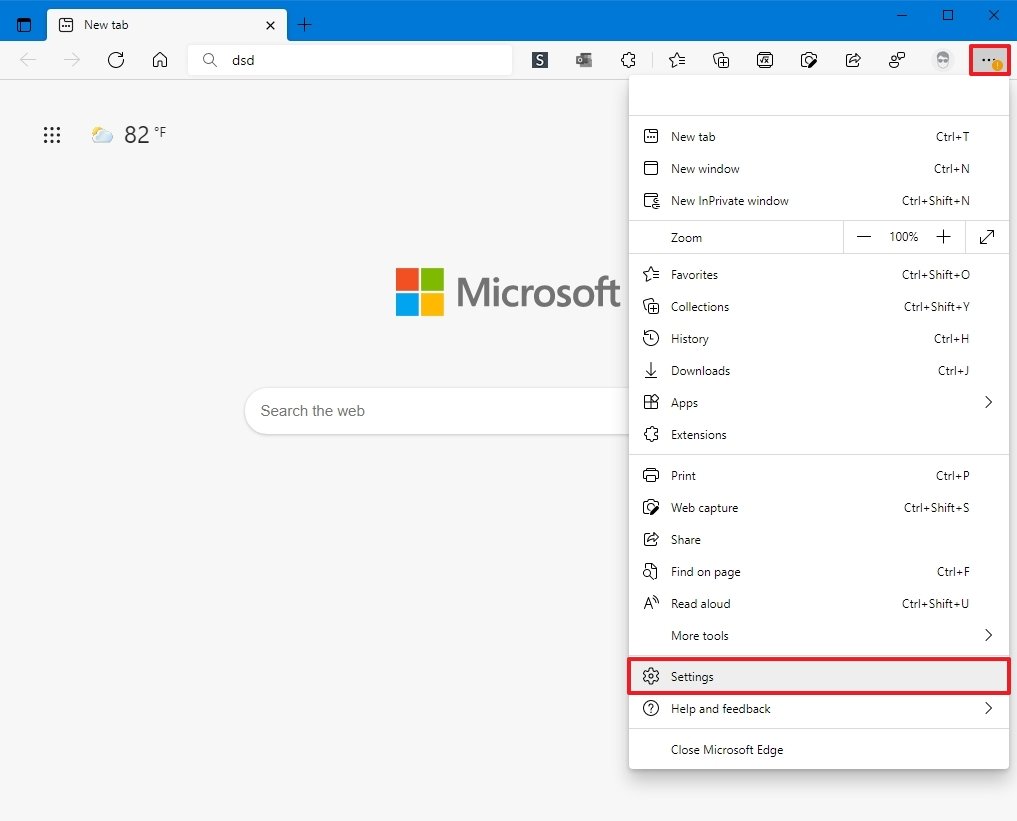
- Click the Settings and more (three-dotted) button from the top-right corner.
-
Click the Settings option.
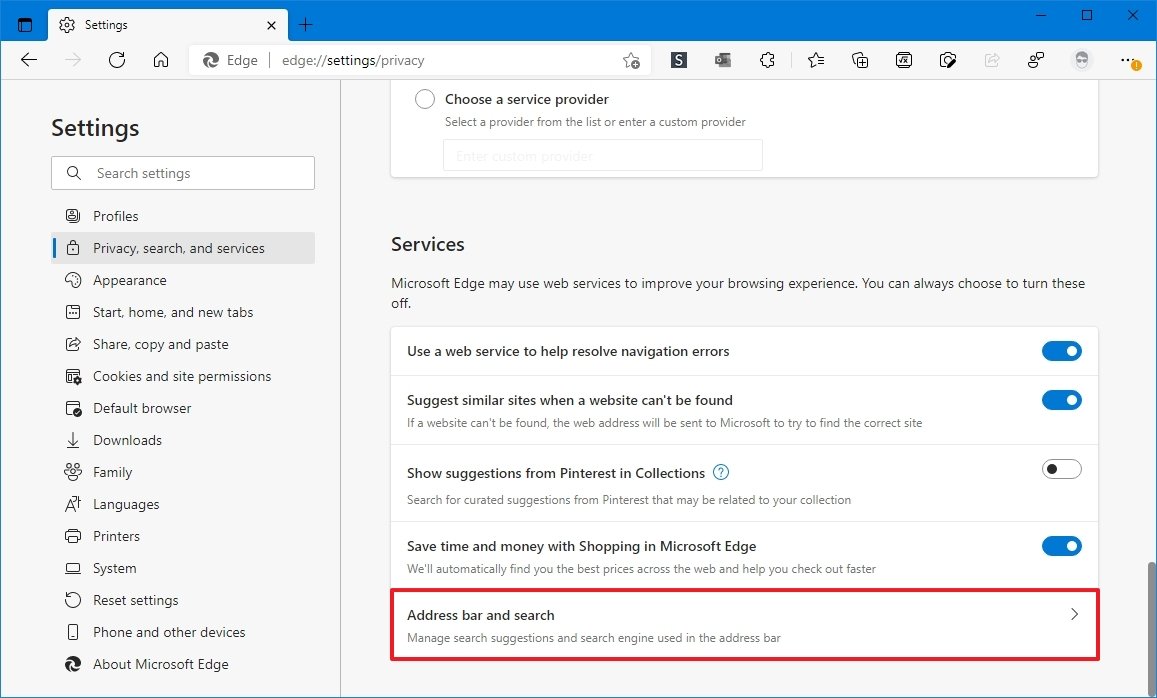
- Click on Privacy, search, and services.
-
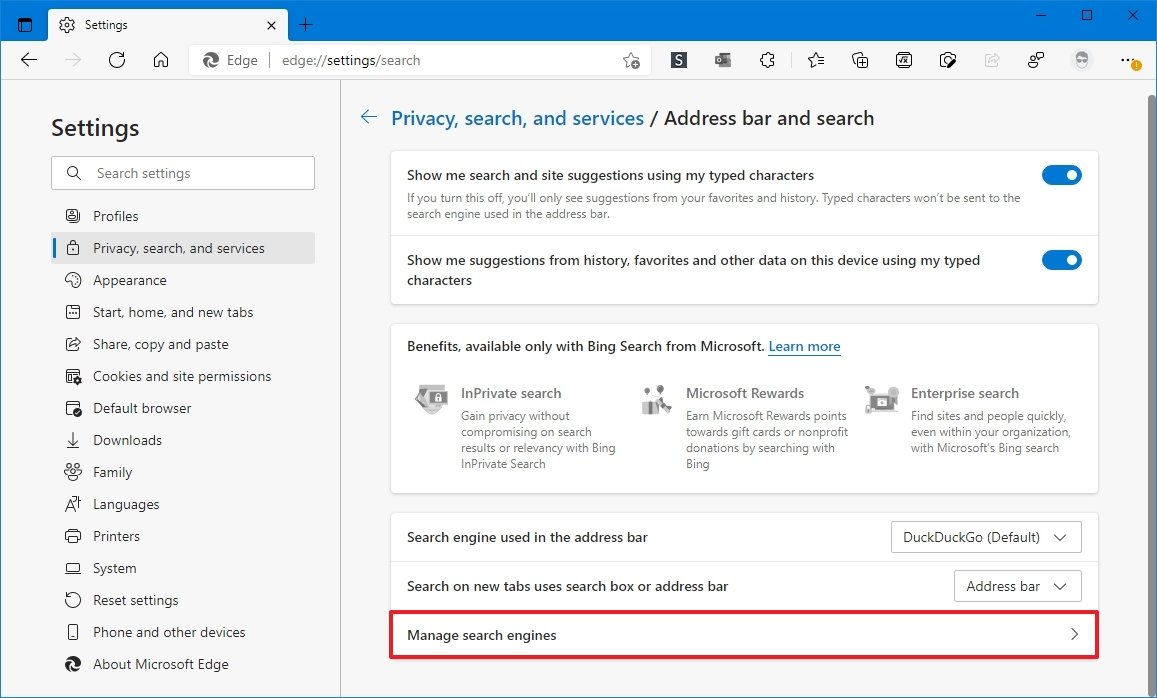
Under the "Services" section, click the Address bar and search setting.
-
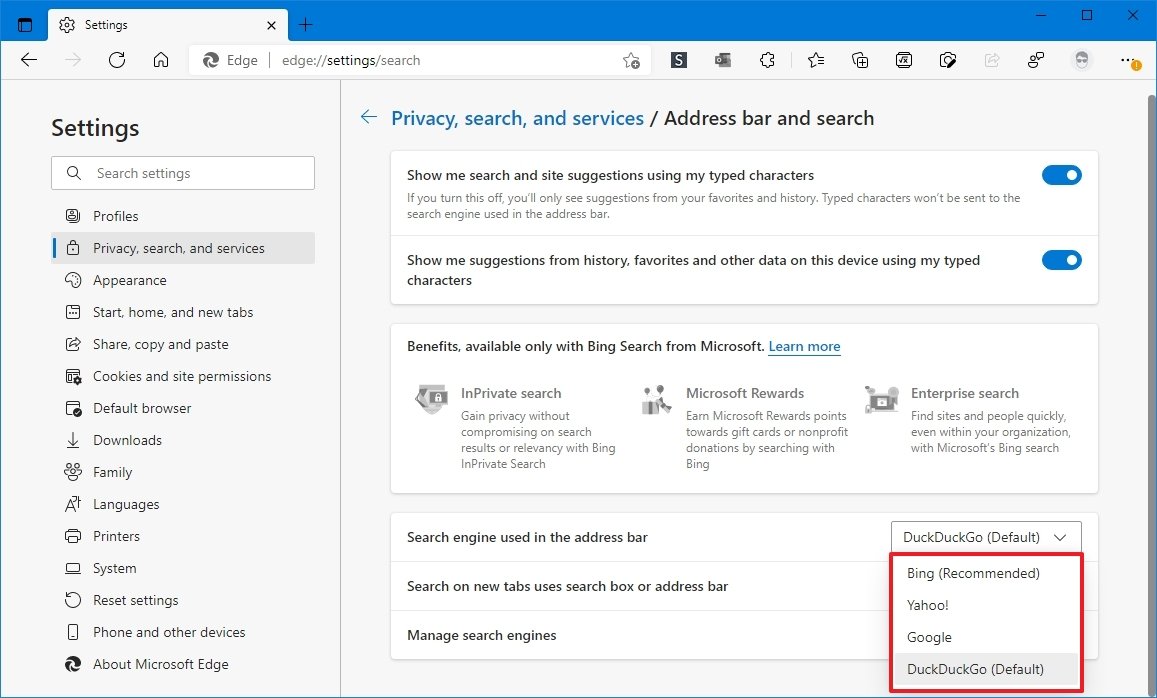
Use the "Search engine used in the address bar" drop-down menu and select the new default search engine — for example, DuckDuckGo, Google, Yahoo!, or Bing (default).
-
(Optional) Use the "Search on new tabs uses search box or address bar" drop-down menu and select:
- Address bar — when typing a query in the search box, the search will move to the address bar.
- Search box — when typing a query in the search box, the search will continue from the search box.
Once you complete the steps, you should be able to open a new tab and search from the address bar with the new default search engine.
How to set custom search engine on Microsoft Edge
If you prefer a different search engine on Edge, you'd need to add it manually with these steps:
- Open Microsoft Edge.
- Click the Settings and more (three-dotted) button from the top-right corner.
-
Click the Settings option.
- Click on Privacy, search, and services.
-
Under the "Services" section, click the Address bar and search setting.
-
Click the Manage search engines option.
Quick tip: While on this page, if you have search engines you do not use, you can always click the button on the right and select the Remove option to delete them.
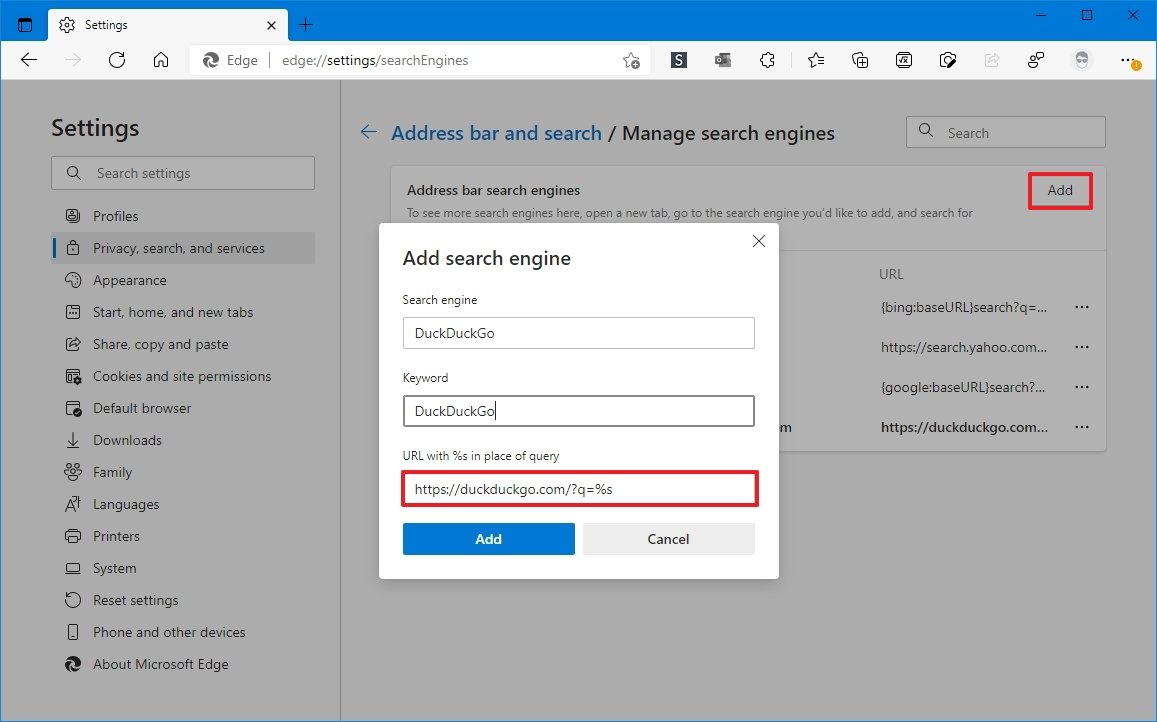
- Click the Add button from the top-right corner.
- Specify a descriptive name for the option — for example, DuckDuckGo.
- Specify any keyword to comply with the requirement — for example, DuckDuckGo.
-
Specify the exact search engine string — for example, to make DuckDuckGo the new default the string should look like this:
https://duckduckgo.com/?q=%sorhttp://google.com/search?q=%sto use Google. - Click the Add button.
-
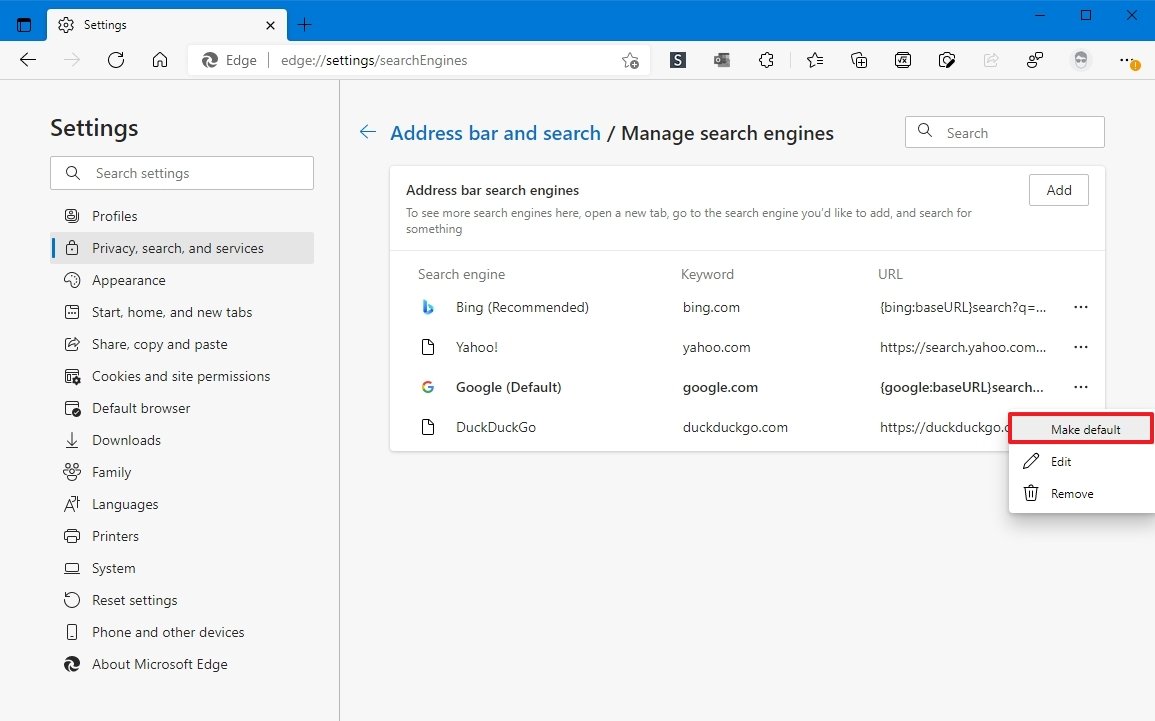
Click the search engine three-dotted button and select the Make default option.
After you complete the steps, as you enter a new query in the address bar, the search should happen with the new engine you have configured. The new option should also appear in the "Search engine used in the address bar" drop-down menu in the "Address bar" settings page.
We're focusing this guide on Windows 10, but these instructions should also work on the previous version of Windows, Windows 11, and other supported platforms like macOS.
More Windows resources
For more helpful articles, coverage, and answers to common questions about Windows 10 and Windows 11, visit the following resources:
via https://AiUpNow.com September 20, 2021 at 07:06AM by Mauro Huculak, Khareem Sudlow,
